
Create a highly detailed and accurate real-world terrain in 3ds Max
To get real-world height map data, we use a site which collates global LIDAR data and processes this for you to create a height map image. The survey is highly detailed and sufficient to map areas to a resolution of 90m/pixel or 30m/pixel.
First a brief word about LIDAR and ALSM
(From Wikipedia) LIDAR is a surveying technology that measures distance by illuminating a target with a laser light. LIDAR is popularly used as a technology to make high-resolution maps , airborne laser swath mapping (ALSM) and laser altimetry.
It uses ultraviolet, visible or near-infrared light to image objects. It can target a wide range of materials, including non-metallic objects, rocks, rain, chemical compounds, aerosols, clouds and even single molecules. A narrow laser-beam can map physical features with very high resolutions; for example, an aircraft can map terrain at 30 cm resolution or better. The general public became aware of the accuracy and usefulness of lidar systems in 1971 during the Apollo 15 mission, when astronauts used a laser altimeter to map the surface of the moon.
Now let’s get a real-world map to play with
Visit http://opentopo.sdsc.edu/datasetsand you’re greeted with a map. Click ‘Select Region’ and marquee the area of interest on the map. As you do so, the map will zoom to fit the marquee in the window.
 |
| The screen that greets the visitor |
At the bottom of the page is a link, usually 'Shuttle Radar Topology (SRTM) Global'. Ignore that link and check the adjacent buttons marked ‘30m’ and ‘90m’, and from this you can choose your base resolution required. Click either 30m or 90m buttons and the map changes again.
 |
| Select Region brings up a global map with LIDAR coverage indicated. |
 |
| Select Region again to hone in on your area of interest. |
 |
| Click 30m or 90m buttons bottom right to select the resolution. |
Again, ‘Select Region’ to highlight the terrain you want. Continue in this manner until you’re happy, then scroll down thru the page to select your image type (GeoTIFF) and so on. Enter your email address without worry - you’ll only get one mail, and it’s to let you know your job is ready. So when done, hit SUBMIT.
 |
| GeoTIFF is just a .tif, it seems. |
 |
| Download link is provided when processing is complete. |
You’ll watch your job process and result in a downloadable tarball. Get the file, decompress it and presto - your image has arrived.
At this point you can reflect on how fortunate we are to have direct access to ranging data via a multi-wavelength laser mounted on a space shuttle in orbit. That’s quite stunning, I think.
Translating the image
At this point, obscure and obsolete software would decode the image for you, but I found a simple method of working it up in Photoshop. Here’s the method:
Open the file in Photoshop. Aside from the light points of urban centres, the image will be completely black. Choose Image -> Adjust -> Levels and move the white (highlight) slider on the input range from value 255 to value 2.
 |
| Looks dark in there. |
 |
| The height map is revealed! |
Hit OK and you now have a height map ready to chuck into Max.
Creating the 3D terrain
Right, so in Max it’s pretty straightforward. Make a plane the same dimensions as your map, set the divisions to be around 350x350 (for 123K faces) or as you please. Add a displace modifier to the stack, load the bitmap into that modifier, adjust the strength of the extrusion and volia - you real-world terrain is formed.
Making the terrain pretty
At this point I create a diffuse map by capturing the map screens from Bing maps, which has an excellent satellite view capability. To get the image to be very high resolution, I’ll capture as many as 30 screens at 1920x1080 and tile them to yield a diffuse map of around 2 Gigapixels, which is usually more than what is required.
Bearing in mind the size of the height map in the displacement, a very large diffuse map may bring on a memory error, particularly if you’re running Windows on less than 16Gb RAM. My Win XP machine can work with 2 x 1.2 gigapixel images on 4Gb RAM, but it requires 8Gb if my plane has more than 250K faces. So you may have to balance the resolutions of the maps against the number of faces on the plane to squeeze a result out of anything other than a fairly beefy system - my i7 with 8Gb simply folds at the sight of the height map when it weighs in at 1.7 gigapixels, so I am compelled to either retreat to the XP system or scale down the maps. Of course, at those sizes, a jpeg is not available as a format option, and the best you can do is make use of a .tif with one (black) channel and LZW compression.
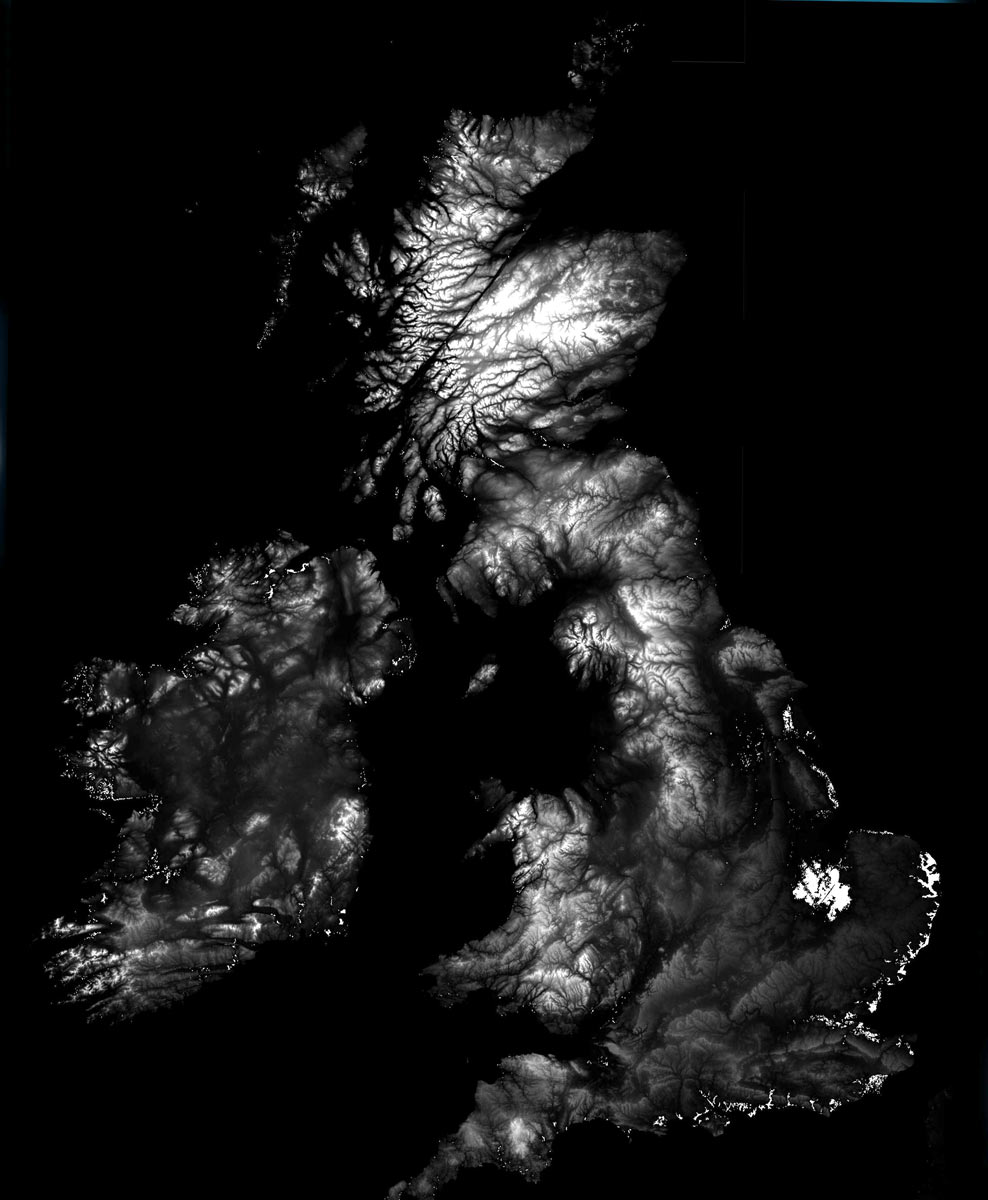 |
| Height map of the British Isles. |
The result
I downsampled the monstrous maps used to create the British Isles topographic map, which you can download from tf3dm.com. The 345Mb height image was a little overboard to try and upload, but I did include a 7000x5164 .tif with that model for the adventurous to try on. For the model itself a 2445x2970 jpeg held the relief detail on the mesh just fine.
Formats: .dwf .max .obj .fbx (and images .mtl .tif .jpg)
Title: British Isles LIDAR Topographic
Description: LIDAR ALSM topographic map with Earthstar diffuse map.
135200 faces, urban centres highlighted, 7000x5164 height map included
Tags: United, Kingdom, Great, Britain, Ireland, Wales, Scotland, Isles, Archipelago, Jersey, Gurnsey, Shetland, Orkney, LIDAR, ASLM, Satellite, UK, Islands, British, England, Anglo, Monarch, Commonwealth, Geographic, Britannia, Gaelic, Celtic, Atlantic, Channel
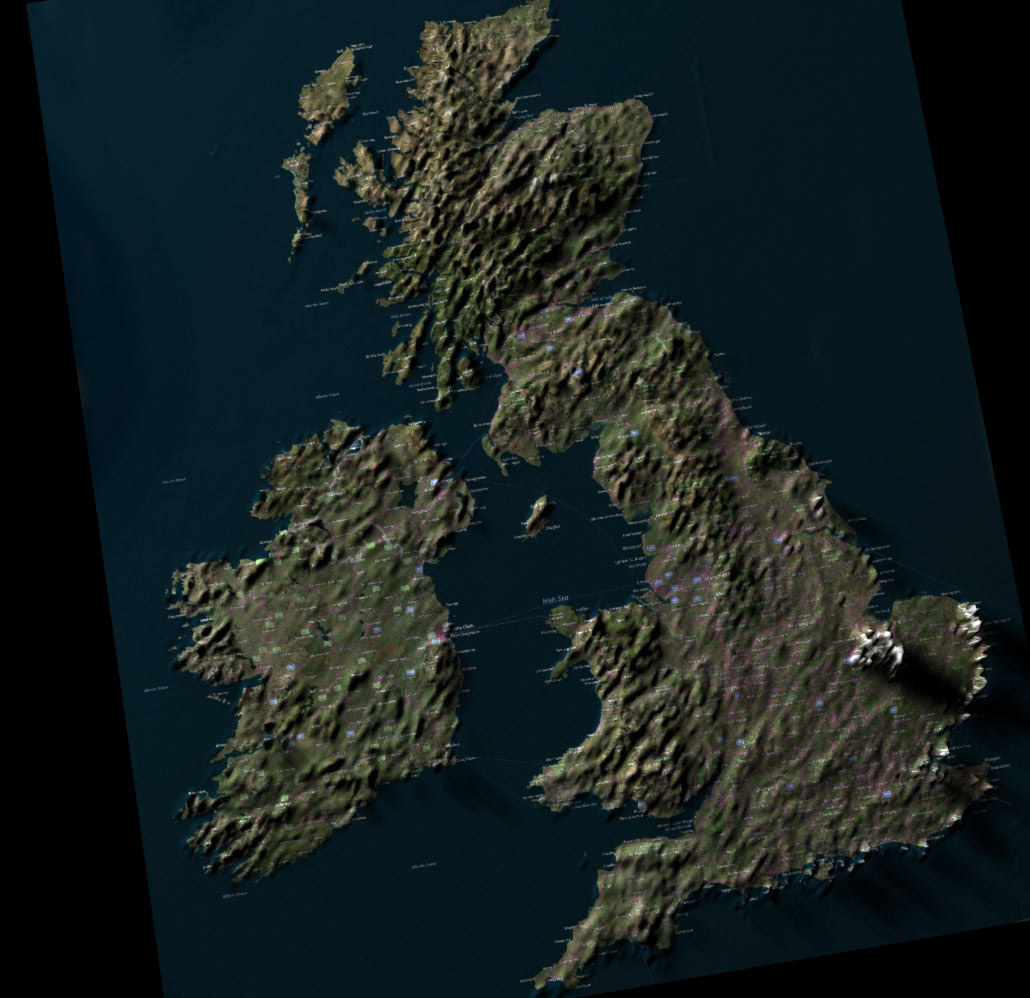 |
| Rendered result. |
That’s it. Easy!
 | |||||||||
| Detail |
Quantum Binary Signals
ReplyDeleteGet professional trading signals sent to your cell phone daily.
Start following our signals NOW & make up to 270% daily.